First Docker Image
Docker! Part 1 - Start It Up
![]()
Let’s Learn How to Use Containers!
The purpose of this post is to run through basics of starting and interacting with Docker containers. Following posts will focus on more advanced topics like uploading to AWS and orchestration.
Installing
Not going to cover it as there are a tons of posts about it. I am using a Debian version of Linux, and VS Code to develop, will reference that. One note on this: Docker will install in Linux requiring root privileges to run. This can create issues. I referenced the page below for managing the security requirements:
https://docs.docker.com/engine/install/linux-postinstall/
Also - this is a practical guide. I am going to use all the cheap and easy shortcuts, IDE tricks and GUI bs I can find. Purists will say this is the cheating of the weak, but I am undeterred. The purpose of this is to document practical, usable techniques for implementing this architecture. Being efficient enables greater breadth of exploration.
Lay of the Land
OK, so the problem with containers for old school people like me is that it’s all encapsulated and virtual. You can’t see a container. You can’t touch it. It’s not a piece of equipment that sits on a rack. So… how do we know what’s there??
Identifying my containers, images and volumes
First, some terminology: there are different components to this, and they all specify different things.
Command Line Reference: https://hub.docker.com/search?type=image
-
An Image is the source code for containers. So, they are source the OS, DB employed for a particular container instance. Image Location: /var/lib/docker
Image List Command:docker images -
A Container is the implementation of an image. It’s the running ‘virtual’ machine.
Container Location: /var/lib/docker
Container List Command:docker ps -a -
A Volume is a storage unit that permits persistence between instantiations of containers. It is the place where is changes, user data are stored. They also allow for sharing of data between containers. Volume Location: /var/lib/docker
Volume List Command:docker volume ls
Ok, so that makes sense sort of… So how do we create a running container from an image, and then add a volume to it? Let’s see.
Create a simple container
First, let’s create a simple container
Right off the bat, where are the images? They are available on the Docker website, including official and verified images. There are tons of them.
Docker Hub Images: https://hub.docker.com/search?type=image
Step 1 - Pull an image (I pulled a generic nginx becasue I want to host a web app, and this makes it easier to set up - it’s an official version):
docker pull nginx
To run the image as a container, we use the command docker run. BUT, we want to do some other things when we run it, so here are the switches I started off with (and probably will stick until I die).
-it /bin/bash - makes the container interactive (i) in a terminal (t) with bash
--name my_nginx_container - call it what you want. It makes it easier to refer to it in the cmd line.
p 8080:80- exposes port 80 on the container to localhost port 8080. This is how to connect to services running on the container from outside it. Want more then one port? Use the -p switch multiples times (-p 8080:80 -p 4343:443)
Weird Issue with AppArmor
I could not stop my nginx container. I was geting an error message indicating that permission was denied.

I google, I Stackoverflowed, and with a magic solution I neither earned nor deserve, I found an answer to this issue. Same as the poster of the question, I installed Docker using the SNAP package manager. Apparently, this also installs an AppArmor profiles that for some reason conflicts with shutting down the Docker containers. I looked into it a little and assume that there is something in the default profile for Docker that is not set right.
In the interest of expediency, I decided to look at this later, and in the meantime I will run my Docker containers with AppArmor disabled (see switch: –security-opt apparmor:unconfined). This is a temporary fix, I understand the implications of doing this in production etc.
So all together the command for starting my nginx container looks something like this for me:
docker run --name my_nginx -p 8080:80 -ti --security-opt apparmor:unconfined nginx bash
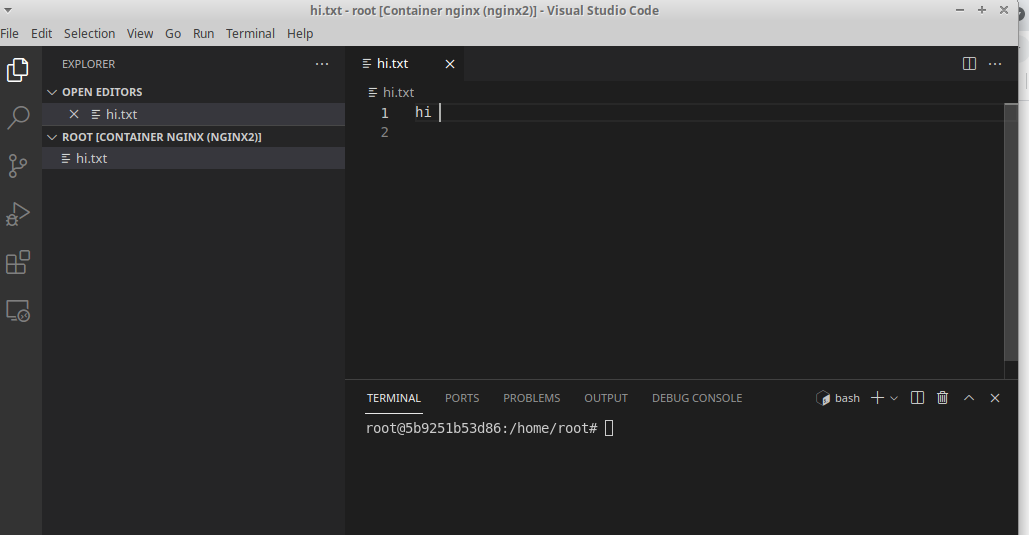
I also can start it in VSCode using a GUI. VSCode also lets me terminal directly into the container, and this can also be done from the command line:
docker exec -t -i my_nginx /bin/bash
The VSCode interface is kind of neat for something available for free. Here’s what my interface to this container looks like:
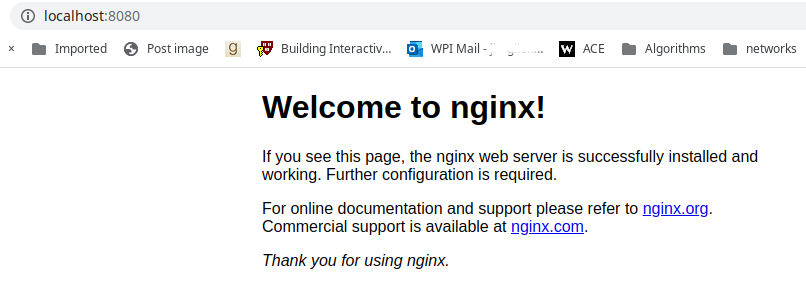
And because I exposed port 80, and because the image as nginx already built into it, the website is available on the host machine at port 8080:
Conclusion
Ok, so we’re off to a good start. The fundamentals of containerization are not too daunting, and the appeal is obvious. For developers who need total control over their stacks no matter where they are hosted, this must offer massive amounts of control. Now that we know how to start one, lets learn a bit more about how to interact with it, develop in it, move info on and off it etc. We know we can set one up, but how is it practically useful?