In the Land of Milk and Honeypots, part one
Setting the stage…
Ok, hello. The purpose of this article is document the creation of a honeypot on my home network safely, and show some of the traffic and activities that are captured and analyzed. It might go without saying that this is a potentially dangerous thing to do, and may jeopardize my other personal devices, and also get me in trouble with my ISP. That being understood, safety is the most important concern in this exercise. Where applicable, active monitoring, logging and alerting will be used to ensure manage any issues.
Why?
Given the danger, why do this? Because honeypots are a great way to learn about malicious activity, how to capture and analyze it, and how to protect against it. As a security professional, this is why we do what we do. This is the most hands-on, direct way of understanding the technology and the risks involved. It is also a great reason to experiment with a variety of InfoSec techniques, tools and practices.
Let’s Begin…
Ok, step 1 this process: segment, segment, segment. It is imperative that the traffic from the honeypot network be separate from the home network. As stated above, I cannot put my home network at risk at all, and because of this I need to make sure the setup is entirely separate. As part of researching this project, I read articles about others building a VM on their laptops and sticking them on the “DMZ” setting of their home router. I am not comfortable with this setup because I assuming that the honeypot device will become completely compromised. Once this happens, that device can be used to pivot into any other devices that can be connected to. Therefore, proper network segmentation is the first and most important step.
The right way to do this is to get a proper professional grade firewall and build out separate networks. However, at this time, I cannot spend the money to get the kind of device that ideally is needed. Instead, I will attempt this on a repurposed Linksys router, using the OpenWRT firmware. I will leverage OpenWRT’s functionality to create segmentation at both layers 2 and 3 and I will use data analysis to demonstrate proper segmentation and control of traffic between the networks created. While this is a bit of a challenge, I feel that this will be the most rewarding means of completing this project and the most learning along the way. Also, there are other, newer firmware’s out there, notably Tomato. Many have commented that Tomato’s interface is quite streamlined, and there are several excellent bandwidth monitoring features. For this experiment, I decided to go with OpenWRT because of its more robust history, documentation and stability.
Setting up OpenWRT
OpenWRT is a Linux based firmware that runs on a variety of home based, inexpensive routers. The reason I am using it is because I can utilize a relatively cheap piece of hardware, but still get a lot of the functionality I need to get what I want. I am also going to use it to enhance other aspects of my home internet use by using other features OpenWRT has to offer. More information can be found at the OpenWRT website (http://wiki.openwrt.org).
My existing home router does not support OpenWRT. To find on the does, I went to Ebay. There were many of them available. I chose a Linksys WRT54G v3 and was able to pick it up for $4.99.
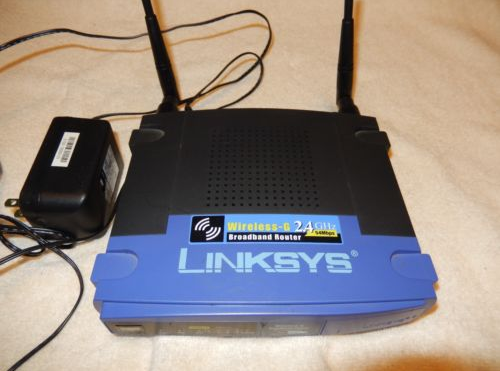
This is picture from Ebay. This is literally how it looked in the box too – they didn’t even unplug the power adapter when they shipped it! I do appreciate the quality bath towel they laid it out on though.
To flash the device with OpenWRT, I followed the instructions posted on the OpenWRT website ( http://wiki.openwrt.org/toh/linksys/wrt54g). These instructions correspond to my specific device, other devices should use the appropriate corresponding instructions.
The installation went ok, I learned the following things along the way:
It was necessary to be really careful when choosing the version of OpenWRT to download and install. As noted on the website, “with the release of ‘Attitude Adjustment (12.09 final)’ on 25th April 2013, lower end devices with only 16 MBB RAM will easily run out of memory. Recommended image for bcm47xx based devices is Backfire with brcm-2.4.” Since this is a really old router, I am limited to Backfire version 10.03. I am also taking the risk and installing the “brcm47xx” version because I am interested in the more full-featured version of Linux.
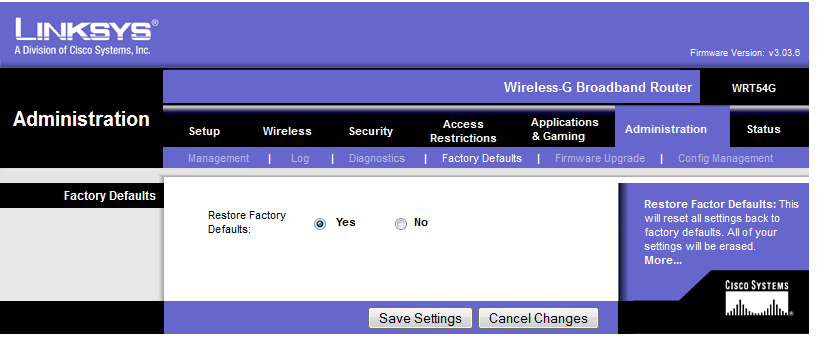
I reset the device back to factory defaults using both the button on the back of the device, and also the setting within the webgui. I am paranoid and OCD – who knows where this thing has been??
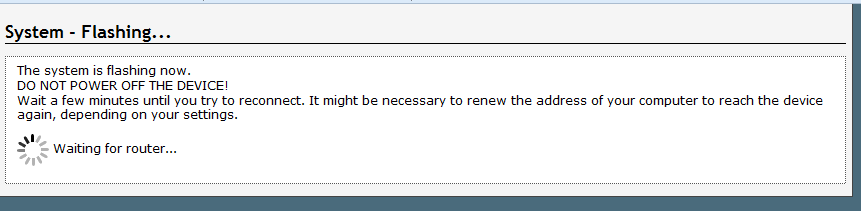
The firmware upgrade seemed to go ok, and I made a telnet session ok.
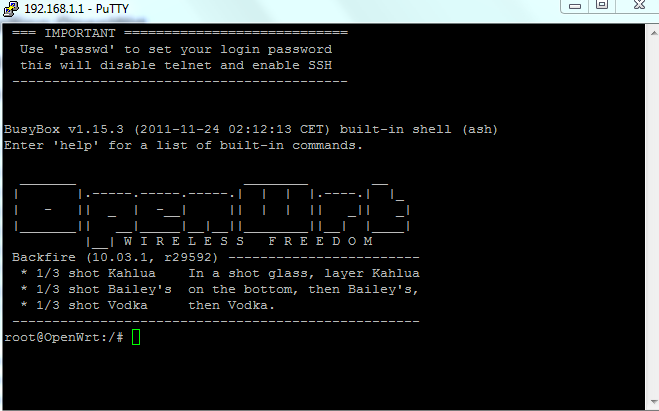
I was pretty impressed by OpenWRT CLI options. It is a pretty advanced for something running on such a small, cheap device. Many of the options and features are those I would have expected to see on a more advanced switch or firewall.
I started by taking the OpenWRT tutorial’s advice and make the device open to tftp in the event I brick it.
nvram set boot_wait=on

nvram set boot_time=10

nvram set wait_time=10

nvram commit && reboot
Once done, I proceeded to work on upgrading to the brcm47xx version of backfire 10.03.1.
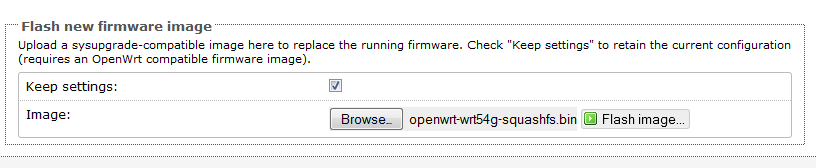
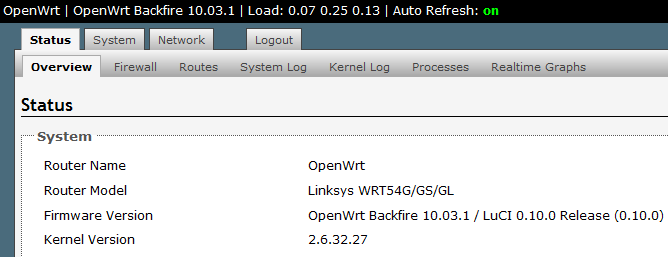
Held my breath a little… the Luci web interface runs really slow. You get the feeling this little device isn’t totally designed to use all this software,
Success!
Designing the network
To setup the device, I envisioned the following, very simple network. The purpose of the network is to isolate my DMZ, permitting only a very specific number of port and protocols between it and the internet, and the internal network. The goal is to create the very basic network illustrated below and ensure that traffic is being appropriately isolated.
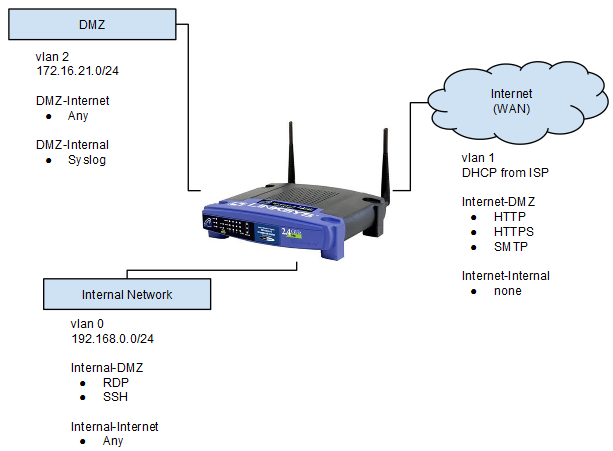
The only traffic between the DMZ and the internal network will be syslog from the DMZ into the internal network. This will be to analyze data from the DMZ device. RDP and SSH originating in the internal network is desirable in order to control the DMZ device(s) from my personal PC. Finally, devices in the DMZ will have HTTP, HTTPS, and SMTP will be opened up to the internet. Other ports may be opened up later as part of testing.
Configuring the VLAN’s and segregating access
To set up the vlans and the firewall to control traffic at layer 3, I referred to an article on the OpenWRT website on setting up DMZ’s ( http://wiki.openwrt.org/doc/howto/dmz?s[]=dmz).
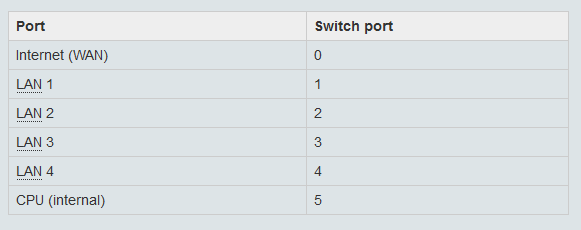
First, I had to set up the ports, and assign the DMZ port. On the WRT54G router, the ports are configured on the following manner:
I set up an additional VLAN 2 on port 1 by adding the following to /etc/config/network.
config switch_vlan eth0_2

    option device   "eth0"

    option vlan     2

    option ports    "1 5"
*Please note that port 1 pertains to switch port 1 on the actual router. It was also necessary to enable switch port 5, which pertains to the internal CPU of the device. If this port is not enabled, the router cannot route the packets (learned from experience!).
I then set up DMZ network:
config 'interface' dmz

    option 'ifname' eth0.2 # This corresponds to "vlan2" above

    option 'proto'   static

    option 'ipaddr'  172.16.21.1   #this is a separate network

    option 'netmask' 255.255.255.0
I then added the following rules to the firewall by configuring /etc/config/firewall. I decided not to enable DHCP on the DMZ network.
config 'zone'

   option 'name' 'dmz'

   option 'input' 'REJECT' # By default, stop anything coming from the DMZ

   option 'output' 'ACCEPT'

   option 'forward' 'REJECT'

   option 'network' 'dmz'

# Allow the DMZ to use the router as a DNS server

config 'rule'

   option 'src' 'dmz'

   option 'proto' 'tcpudp'

   option 'dest_port' '53'

   option 'target' 'ACCEPT'

# Allow the DMZ to use the router as a DHCP server

#NOT ENABLING

#config 'rule'

#       option 'src' 'dmz'

#       option 'proto' 'udp'

#       option 'dest_port' '67'

#       option 'target' 'ACCEPT'
*I chose not to enable a DHCP server on the DMZ network, but did so for the internal VLAN at this time.
# Allow the DMZ to access the Internet

config 'forwarding'

   option 'src' 'dmz'

   option 'dest' 'wan'

# Allow the LAN to access the DMZ

config 'forwarding'

   option 'src' 'lan'

   option 'dest' 'dmz'
Issue with wireless
I had an issue getting wireless to work. The AP would not broadcast and I could not get the wireless interface to become enabled. I was getting the following error message: “Wireless is disabled or not associated”. I reviewed the file /etc/config/wireless and noted that the “option type” under the wifi device was set to “Broadcom”. A little research showed that this configuration was a holdover from the brcm-2.4 kernel, however as noted above this was upgraded to bcm47xx. I was a little concerned about the packages that would be needed to fix this, but as it turns out a resolution was really simple (thanks linuxb - https://forum.openwrt.org/viewtopic.php?id=22311&p=14):
rm /etc/config/wireless; wifi detect > /etc/config/wireless
That resolved the issue and enabled the wireless radio and set up the config file in the following generic way:
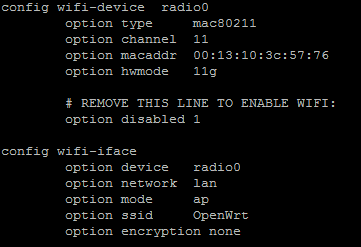
To complete the remaining wireless configuration, I used the tutorial on the OpenWRT website ( http://wiki.openwrt.org/doc/uci/wireless).
Conclusion
OK – that’s it for this entry! Next time we’ll work on setting up some NAT’s and opening up some choice ports. After that, onto server configuration and then the real fun begins!