In the Land of Milk and Honeypots, part two
Hardening the OpenWRT device…
As noted in my previous entry, the purpose of this series of posts is to document the creation of a honeypot, and the use of tools and techniques to analyze activity. In this post, I will continue configuring the OpenWRT router, lock down some of the settings, and also set up some NAT’s and open ports.
Installing tcpdump
First things first, we have to lock down the LinkSys router. Before we begin, there’s something I want to add to the router. It’s one of the best, simple networking tools in the world: tcpdump. I want this because I am going to use it to test the natted IP’s that are created later on.
To get started, first go to update the package list on the device:
opkg update
Then install the package
opkg install tcpdump
Ok, so that was slow. This router is struggling. Will probably look into upgrading later on. There is barely enough memory or space on this thing to do a lot.

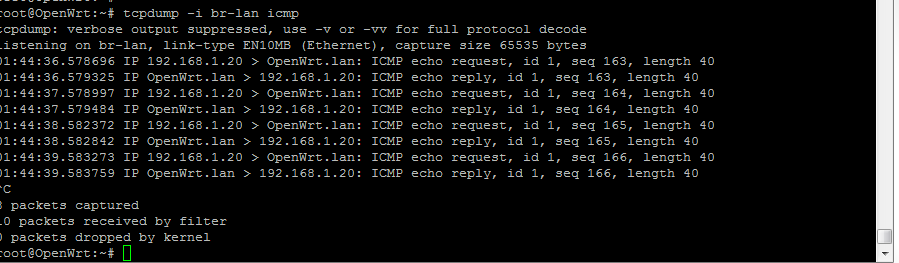
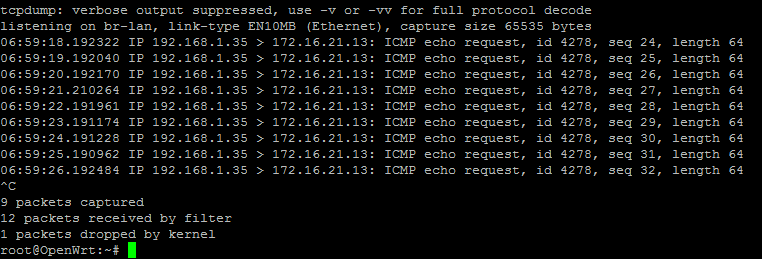
To test that the tool is installed ok, I’ll monitor the LAN interface for ICMP traffic, and ping it:
tcpdump -i br-lan icmp
Ok, seems to be up and running! Rebooted a few times, and retested. There were a couple of hiccups, and the wrong dump will easily overwhelm the device. But generally, we are set to move on.
Setting up public key authentication
Next I need to start and lock the router down. There are several standard steps that will be taken. Mostly, I following along with the items noted on the OpenWRT website where an excellent tutorial exists (http://wiki.openwrt.org/doc/howto/secure.access).
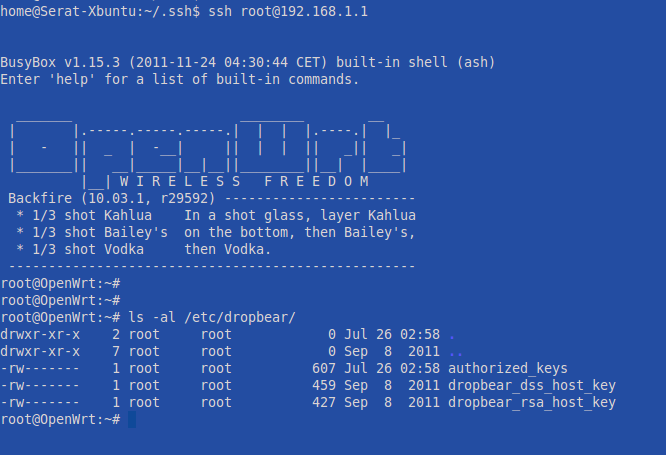
I want to start by setting up keys that need to be present in order to SSH to the router. I generated a key pair on my laptop using OpenSSH, and copied the public one onto the router. I then successfully configured the router to utilize the keys in place of the id and password.
I also tested from my Windows machine using Putty. To do this, it was necessary to use the PuTTYgen tool. I imported my exiting SSH key into this tool, and then saved it as a .PPK file. I also am using the Pageant program to save the passphrase so I don’t have to enter it everytime I log into the router. I then disabled password auth for login:
root@OpenWrt:~# uci set dropbear.@dropbear[0].PasswordAuth=off
root@OpenWrt:~# uci commit dropbear
I then tested this by removing the private key from the putty connection and seeing what happens….
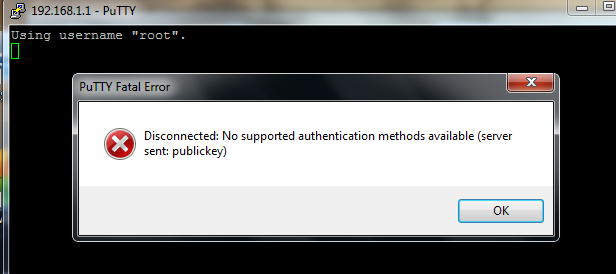
…and the connection timed out. That is good. I then reenabled the .PPK profile and was back in business.
I also took the last piece of advice from the tutorial, and completely disabled telnet:
rm /etc/init.d/telnet
Finally, I changed the port that SSH listens on to something completely random and also bound it to the LAN interface only.
Account Management
I created a second account on the device and created a directory for it. I also permitted it to sudo with the root password by uncommenting the following lines in visudo:
Defaults targetpw # Ask for the password of the target userALL ALL=(ALL) ALL # WARNING: only use this together with ‘Defaults targetpw’
I could not login with my new user account because the key was not present in the new account’s home directory. It was necessary to copy it over (had to create the dir. too):
cp /etc/dropbear/authorized_keys /home/jefbags/.ssh/
Finally, I tried to limit access to the web interface from http and only allow https. However I ran out of space on the disk, so that didn’t work. I’ll revisit that one at some point and do something, maybe tunneling via SSH. If I were to do this though, I would bind the webserver to the LAN interface only, and pick a completely random port, as follows:
uci delete uhttpd.main.listen_http
uci set uhttpd.main.listen_https=192.168.1.1:5551
uci commit
/etc/init.d/uhttpd restart
Setting up the Source NAT from the LAN to the DMZ
Now I want to ensure that when any traffic goes from the LAN to the DMZ, it gets natted to an address on the DMZ network. We don’t have to worry about configuring an access rule for this, because noted in the last post, we are allowing all traffic from the LAN to the DMZ.
To set up the natting, we need to configure a redirect on the router. I tried by editing /etc/config/firewall directly. Had some issues, here’s what I settled and got to work fine:
config 'redirect'
option '_name' 'Source NAT from LAN to DMZ'
option 'src' 'lan'
option 'proto' 'tcpudp'
option 'dest_ip' '172.16.21.0/24'
option 'target' 'SNAT'
option 'dest' 'dmz'
option 'src_dip' '172.16.21.201'
option 'src_ip' '192.168.1.0/24'
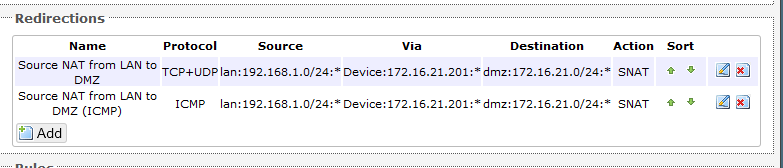
I also ended up creating a second rule similar to this specifically for ICMP. At this time, I don’t know how to include both TCP-UDP and ICMP in the same rule and have it actually work. I’m sure there’s syntax that eludes me, but this will work for now. This is what they end up looking like in the web GUI.
I also had issues with ARP. Because of the source natting, the natted IP address (in this case 172.16.21.201) does not have an associated layer 2 address. Therefore, the receiving computer will not know what MAC address to send the packets back to. To fix this, it is necessary to associate the natted IP with the router’s MAC address. This can be done with the IP address command, as follows below (In order to use this command, you will need to install the “IP” package. To make it permanent and survive a reboot, the address needs to be added to /etc/config/network):
ip address add 172.16.21.201 dev eth0.2
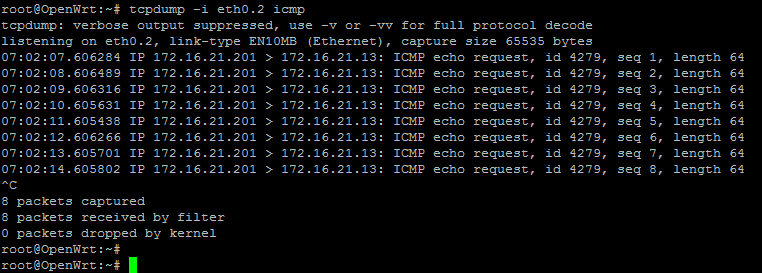
OK, so how do I know this is working? I can use tcpdump, which I installed earlier. I can ping the test device I have out on the DMZ. If I look at the LAN interface, I can see the address of my laptop, 192.168.1.13:
But, if I look on the DMZ interface, I can confirm that the source IP address has changed to the intended new source of 172.16.21.201l.
Opening up DNAT on the DMZ to the WAN
Eventually, we’ll want to open up ports on the DMZ to the internet. Once that happens, any services we have runnnig on the open ports will be exposed. That’s fine though, it’s the reason this is all being set up!
To configure the open ports, I will do something like the below configurations:
config redirect
    option src       wan
    option src_dport 80
    option proto     tcp
    option dest      dmz
    option dest_ip   172.16.21.2
172.16.21.2 will be the static address of the server once it gets set up. For now, we’ll leave this redirect rule commented out in the configuration. I will also need an access rule that permits the traffic, but I think I will come back to it as we get the server hardened and get into the testing.
Conclusion
Well, I do feel more secure now. This has been a lot of stuff. Next time, I’ll test and see how things work and then move on and setting up the server.