MHN: Deploying a Honeypot Sensor
MHN: Deploying a Honeypot
In the last post, I finished setting up the server, and installing the Modern Honey Network (MHN) server and infrastructure. Everything seems to stable and running ok, so now it’s time to move on to deploying the sensors. Fortunately, the MHN server makes this super easy, so let’s deploy a few and see how it goes.
Sensor architecture
As described in the last post, each sensor will be pushed onto virtual devices. I reviewed the MNH wiki pages for recommended hardware of the sensors (https://github.com/threatstream/mhn/wiki/Hardware-Recommendations). ThreatStream recommends the following:
- 512MB-1GB RAM
- dual core CPU
- 20GB drive. <– could get away with less if you rolled logs aggressively.
In terms of running more than one sensor on the same sensor, I referred again to the ThreatStream wiki (https://github.com/threatstream/mhn/wiki/Running-Multiple-Honeypots-on-the-same-server) which noted the following combos to beware of and/or avoid:
The following listen on port 80, and only one should run on the same sensor, unless different ports are configured:
- conpot
- glastopf
- wordpot
- shockpot
The following listen on windows ports 445, 139, etc. Chose one or modify to listen on different ports:
- Amun
- Dionaea
These can be run with each other and any of the others (no port conflicts):
- kippo
- snort
- suricata
- p0f
- elastichoney
Running Snort and Suricata together is generally not necessary though.
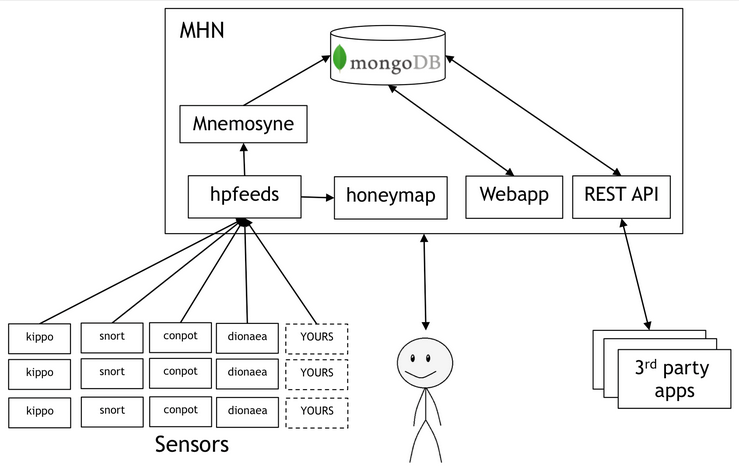
Installing the sensors will follow the general arhitecture diagramed below, from the MHN website.
Deployment: kippo
we’ll start with kippo to test ssh attacks. And again, we’ll be following along using this excelent guide from IT and Security Stuffs.
https://itandsecuritystuffs.wordpress.com/2015/02/03/honeypot-networks/
To get the command, log into the web interface, and go to the “Deploy” page, copy the command and run it on the sensor. That’s it!
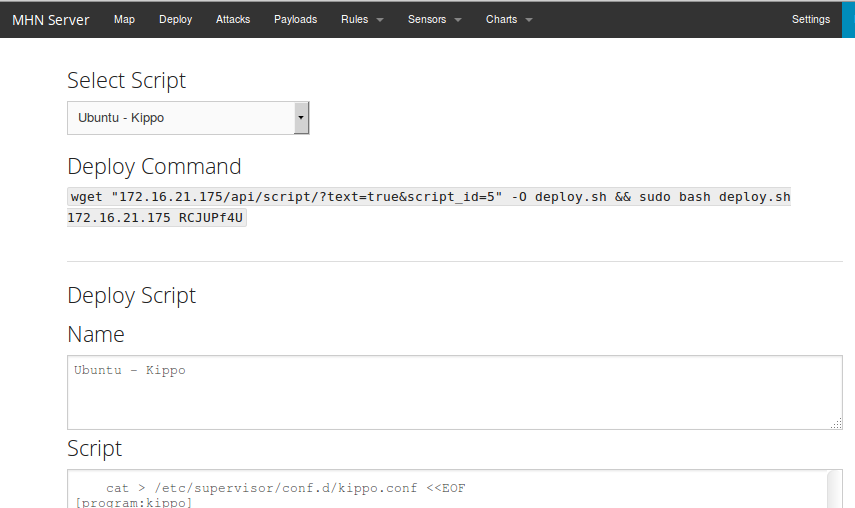
The script took a little while to run on the sensor, but it went in fine.
A couple of things about kippo…
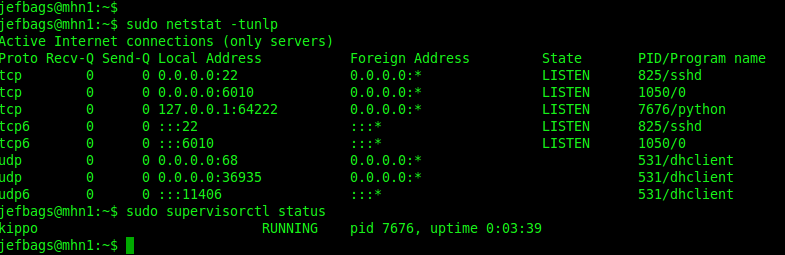
First, it was necessary to ensure that the server was listening on port 22 for ssh. so, in previous installations we changed the ssh port. That won’t work with the kippo deployment and the port setting in /etc/ssh/sshd_config needs to remain at 22.
Another thing I noticed is that for whatever reason, I didn’t get a second port on which the real ssh server was listening. According to the documentation, the program should have gotten a second port listening for ssh on 2222 or somehting like that. I didn’t get that, so I couldn’t make a connection remotely via ssh.

THIS WAS RESOLVED WITH CLEAN INSTALL
When I did try to connect, I it through kippo. I was able to brute force the easy password using Medusa with no issue.

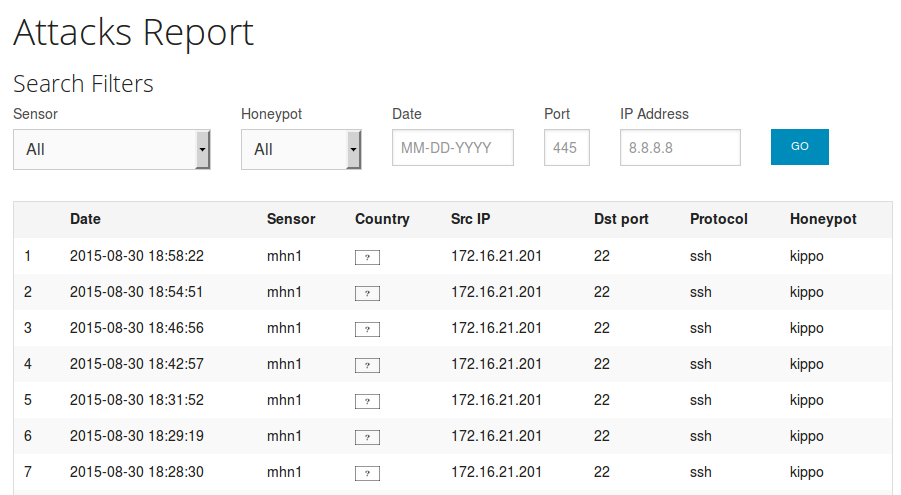
In MHN, the program registered me as an attacker.
Conclusion
A couple of bumps in setting up kippo, but all in all feel like this is in good shape. Next time, I’ll work on securing the MHN web app a little bit more, and also digging into kippo’s functionality a bit more. I will also prepare the firewall for external connectivity.